
 I spent some time last Monday doing more cyanotypes. I made them 4×6 so I could use them as postcards for the postcard swap.
I am really enjoying this printing process. I am learning all kinds of things about printing in general, and specifically contact printing (which I am finding myself interested in).
In case anyone is interested in how this is done, here is how I made this particular print:
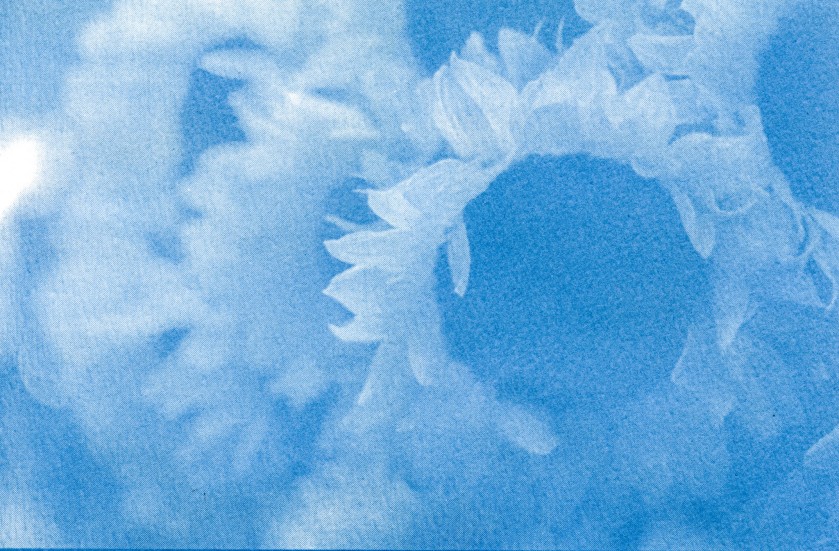
1. Find a photo that you think might make a good print. I am still trying to figure what kinds of photos make good cyanotype prints. I have read a few things about this but I learn best via trial and error. Her is the original shot I used. I took it last year in Vacouver B.C. at the farmer’s market on Granville Island.

2. Invert your photo in your favorite image editing software. The idea is to make your photo into a large negative, as cyanotype is a contact printing process. I use Adobe Lightroom so for me to invert my image I had to adjust the tone curve (using the instructions here). I created a develop preset for this function.
3. Make your digital negative printable. This, oddly, was the hardest part of this whole process for me at first. Then I discovered Lightroom has a printing module . It makes this part really easy. I save my file as a PDF.
4. Print digital negative onto transparency paper. You can buy transparency paper at office supply stores or at Amazon.
5. Mix chemistry. I use the Photographer’s Formulary liquid kit. Mix even amounts of A and B. You will not need very much of each. A small cup used for cough syrup works well to measure out your chemistry. I mix it into a small glass jar recycled from the bin. Once the chemistry is mixed it is photo sensitive so you must mix it in a darkened room. I have a safelight, so I keep that on so I can see. I don’t think the room has to be pitch black dark. I’ve done this in the bathroom with the lights off and light streaming in from under the door and everything turned out fine.
6. Apply chemistry to watercolor paper. This is the part I am still struggling with, so I am not sure I can give much instruction here. At the moment I am using an art sponge brush and it seems to work OK. I brush it on in horizontal strokes, and then go over it again using vertical strokes. The idea is to get it on evenly and just the right amount. After you have applied the chemistry let it dry in the dark.
7. Place your transparency negative on the paper and put a piece of glass on top (sandwich the transparency between the paper and the glass). You want the transparency as flat as possible on the paper.
8. Place your paper/transparency/glass sandwich in the sun. When your image turns army green it is done.
9. Rinse in running water for 5 minutes. You will watch it develop before your eyes like magic.
10. Place in a hydrogen peroxide/water bath of for a second to bring out the deep blue color. 50 ML of hydrogen peroxide to 500 ML of water.
11. Let dry.
If I can do this anyone can! It’s fun and easy and a great way to learn about making prints. It would probably be a great thing to do with kids.

This is so cool! Seems pretty easy to do as well, I’ll have to try it out.
LikeLike
Thanks a lot for the valuable info!!!
LikeLike
Your very welcome!
LikeLike
I need to start making them again soon, but with my face tanning thingy instead of the sun. 😉
LikeLike
your face tanning thingy is awesome. I am keeping half an eye out for one of those! 🙂
LikeLike
Got it at the charity shop for 5 euros. 🙂
LikeLike
The stuff is really only sensitive to UV light. I now coat my paper in the living room, under normal lighting conditions and have no problems.
LikeLike
That is really good to know! I will do that next time!
LikeLiked by 1 person
I’ll keep my fingers crossed – but I really think you won’t have any problems. I have even seen a guy coat his Cyanotype outside on a cloudy day!
LikeLike
It can’t hurt to try!
LikeLike